Menu

Get ready to embark on a culinary adventure that combines the beloved flavors of Katsudon with a unique twist. We present to you Baked Katsudon, a mouthwatering creation that elevates this Japanese comfort food to new heights. Picture succulent breaded pork chops, crispy on the outside and tender on the inside, baked to perfection and topped with a luscious egg. As it emerges from the oven, the aroma fills the air, enticing your taste buds and promising a truly unforgettable dining experience.

What sets Baked Katsudon apart is its innovative approach. Rather than the traditional stovetop method, we take this classic dish to new dimensions by baking it, allowing the flavors to meld and intensify. The result? A tantalizing harmony of textures and flavors that will leave you craving more.

Imagine golden-brown pork chops, encased in a delectable layer of panko breadcrumbs, fried to a perfect crispness before being baked to seal in their juiciness. Nestled beneath these delectable cutlets, a bed of caramelized onions imparts a subtle sweetness and adds depth to every bite. The pièce de résistance: a gently baked egg crowning each chop, adding a creamy richness that melds seamlessly with the savory flavors.

With each forkful, you'll experience a symphony of tastes and textures. The tender pork, the satisfying crunch of the breadcrumb coating, the silky yolk that melds with the flavorful sauce and rice below — it's a true sensory delight. The combination of the juicy meat, the umami-packed sauce, and the fluffy Japanese rice creates a harmony of flavors that is both comforting and exciting.

Whether you're a fan of traditional Katsudon or looking to explore new culinary horizons, Baked Katsudon is a must-try dish that promises to satisfy even the most discerning palates. Impress your family and friends with this unique twist on a Japanese classic, elevating your home-cooked meals to restaurant-quality indulgence.

So, gather your ingredients, preheat your oven, and let the magic of Baked Katsudon unfold before your eyes. Prepare to savor each delectable bite, savoring the fusion of textures and flavors that will transport you to the heart of Japan's vibrant culinary scene. Get ready to embark on a culinary journey that will leave you craving this extraordinary dish time and time again. Baked Katsudon awaits, ready to captivate your senses and redefine your love for Japanese cuisine.

Ingredients:

  • 4 boneless pork chops
  • Salt and pepper, to taste
  • 1 cup all-purpose flour
  • 2 large eggs, beaten
  • 1 cup panko breadcrumbs
  • Cooking oil, for frying
  • 1 onion, thinly sliced
  • 4 cups cooked Japanese rice
  • 4 large eggs
  • 1 cup chicken or vegetable broth
  • 4 tablespoons soy sauce
  • 2 tablespoons mirin (sweet rice wine)
  • 2 tablespoons sugar
  • Sliced green onions, for garnish
  • Pickled ginger, for serving (optional)

Instructions:

  1. Preheat your oven to 400°F (200°C).

  2. Season the pork chops with salt and pepper on both sides. Set up a breading station with three shallow bowls: one with flour, one with beaten eggs, and one with panko breadcrumbs.

  3. Dredge each pork chop in the flour, then dip it in the beaten eggs, and finally coat it evenly with the panko breadcrumbs. Make sure each pork chop is well coated.

  4. Heat cooking oil in a large skillet over medium heat. Fry the breaded pork chops for about 2-3 minutes on each side, until golden brown. Once done, transfer them to a baking dish.

  5. In the same skillet, add the sliced onions and cook until they become translucent and slightly caramelized. Spread the cooked onions evenly over the pork chops in the baking dish.

  6. In a separate bowl, whisk together the chicken or vegetable broth, soy sauce, mirin, and sugar. Pour this mixture over the pork chops and onions in the baking dish.

  7. Bake in the preheated oven for about 15-20 minutes, or until the sauce has thickened and the pork chops are cooked through.

  8. While the pork chops are baking, cook the Japanese rice according to the package instructions.

  9. Remove the baking dish from the oven. Carefully crack an egg onto each pork chop, spacing them out evenly. Return the dish to the oven and bake for an additional 5-7 minutes, until the eggs are cooked to your liking.

  10. To serve, place a portion of cooked rice into individual bowls. Carefully place a pork chop with the egg on top of each bowl of rice. Spoon some of the sauce and onions from the baking dish over the pork chops.

  11. Garnish with sliced green onions and serve the Baked Katsudon hot. You can also serve it with pickled ginger on the side for added flavor.

Enjoy your homemade Baked Katsudon!

0

Twinkies image1
Introducing Twinkies: A Delightful Delicacy for Dessert Lovers

Prepare to embark on a tantalizing journey through the realm of sweet treats as we delve into the delectable world of Twinkies. With a rich history and a unique charm of their own, Twinkies have become an iconic and beloved dessert across the globe. These golden-hued, finger-sized cakes have captured the hearts and taste buds of millions, offering a delightful combination of soft, sponge-like texture and a creamy filling that's simply irresistible.

Twinkies image2

Originating in the United States in the early 20th century, Twinkies have stood the test of time, evolving into a timeless classic that continues to satisfy sweet cravings to this day. The allure of Twinkies lies not only in their delightful taste but also in their distinctive appearance—a perfectly shaped oblong cake, meticulously crafted to bring joy with every bite.

Biting into a Twinkie unveils a symphony of flavors that harmoniously blend together. The moist, fluffy cake cradles a velvety, marshmallow-like center, creating a delightful contrast in textures that dance on your palate. Whether enjoyed as a standalone indulgence or as a versatile ingredient in creative desserts, Twinkies offer a delightful experience that leaves you craving for more.

While Twinkies have earned their place as a beloved dessert, they have also become a symbol of nostalgia, reminding us of childhood memories and simpler times. They evoke a sense of joy and wonder, transporting us back to carefree afternoons and school lunchbox surprises. With each bite, Twinkies awaken a sense of childlike delight, bringing smiles to faces young and old.

In conclusion, Twinkies have cemented their status as a beloved dessert, captivating dessert enthusiasts around the world with their irresistible charm. They are more than just a cake; they represent a delightful escape, a momentary retreat from the hustle and bustle of daily life. So, indulge your senses, embark on a journey of sweetness, and let the magic of Twinkies brighten your day with their unique blend of cakey goodness and creamy filling.


Twinkies image3
 Ingredients

  • 1 ½ cups all-purpose flour
  • 1 teaspoon baking powder
  • ½ teaspoon salt
  • 4 tablespoons unsalted butter, softened
  • ½ cup granulated sugar
  • 1 teaspoon vanilla extract
  • 2 large eggs
  • ½ cup whole milk
  • 1 tablespoon vegetable oil
  • ½ cup marshmallow creme or marshmallow fluff
  • Powdered sugar, for dusting

For the filling:

  • ½ cup unsalted butter, softened
  • 1 cup powdered sugar
  • 1 teaspoon vanilla extract
  • 2 tablespoons heavy cream

Instructions:

  1. Preheat the oven to 350°F (175°C). Grease and flour a Twinkie-shaped pan or a muffin pan if you don't have a Twinkie pan.
  2. In a medium bowl, whisk together the flour, baking powder, and salt. Set aside.
  3. In a large mixing bowl, cream together the softened butter and granulated sugar until light and fluffy.
  4. Add the vanilla extract and eggs to the butter mixture, one at a time, beating well after each addition.
  5. Gradually add the dry ingredients to the wet ingredients, alternating with the milk. Begin and end with the dry ingredients, mixing well after each addition.
  6. Stir in the vegetable oil until the batter is smooth and well combined.
  7. Fill each cavity of the pan about two-thirds full with the batter.
  8. Bake in the preheated oven for 12-15 minutes, or until a toothpick inserted into the center comes out clean.
  9. Remove the cakes from the oven and let them cool in the pan for a few minutes. Then transfer them to a wire rack to cool completely.
  10. While the cakes are cooling, prepare the filling. In a mixing bowl, beat the softened butter, powdered sugar, vanilla extract, and heavy cream until smooth and creamy.
  11. Once the cakes have cooled, use a piping bag or a small knife to fill each cake with the marshmallow creme or fluff through a small hole on the bottom.
    Twinkies image4
  12. Dust the filled cakes with powdered sugar and serve.

Enjoy your homemade Twinkies!

0


Introduction:

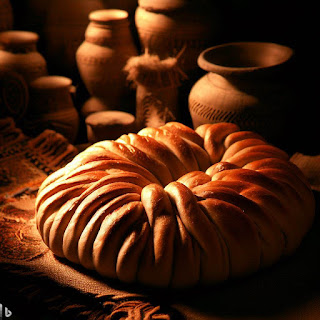
Indulge in the rich flavors of Afghanistan with this delightful Afghani bread recipe. With its soft texture and aromatic taste, this traditional bread is perfect for accompanying a variety of dishes or enjoying on its own. Follow these step-by-step instructions to recreate this authentic Afghani culinary delight in your own kitchen.

Ingredients:

  • 4 cups all-purpose flour
  • 2 teaspoons active dry yeast
  • 2 tablespoons sugar
  • 1 teaspoon salt
  • 1 cup warm water
  • 2 tablespoons vegetable oil
  • Nigella seeds (optional, for garnish)

Instructions:

  1. Prepare the Yeast Mixture: In a small bowl, combine the warm water, sugar, and active dry yeast. Stir gently and let it sit for about 5 minutes, or until the mixture becomes frothy. This indicates that the yeast is activated.

  2. Combine the Dry Ingredients: In a large mixing bowl, sift the all-purpose flour and salt together. Create a well in the center of the flour mixture.

  3. Mix the Dough: Pour the activated yeast mixture into the well in the flour. Gradually mix the flour and yeast mixture together, incorporating more flour as needed, until a soft and slightly sticky dough forms.

  4. Knead the Dough: Transfer the dough onto a lightly floured surface. Knead the dough for about 8-10 minutes, or until it becomes smooth, elastic, and no longer sticky. Add a little flour if necessary to prevent sticking.

  5. Let the Dough Rise: Grease a large bowl with vegetable oil and place the kneaded dough in it. Cover the bowl with a clean kitchen towel and let the dough rise in a warm place for about 1-2 hours, or until it doubles in size.

  6. Preheat the Oven: Preheat your oven to 400°F (200°C) and place a baking stone or a baking sheet inside to preheat as well. This will help achieve a crispier crust.

  7. Shape the Bread: Once the dough has risen, gently punch it down to release any air bubbles. Divide the dough into small portions and shape each portion into a round or oval-shaped bread, approximately 1/4 to 1/2 inch thick.

  8. Let the Bread Rest: Place the shaped bread on a parchment-lined baking sheet. Cover them with a kitchen towel and let them rest for about 15-20 minutes to allow for a final rise.

  9. Bake the Bread: Sprinkle the optional nigella seeds on top of the bread for added flavor and visual appeal. Carefully transfer the baking sheet onto the preheated baking stone or baking sheet in the oven. Bake for approximately 10-12 minutes, or until the bread turns golden brown and develops a slightly crispy crust.

  10. Enjoy! Remove the bread from the oven and let it cool on a wire rack for a few minutes. Serve the Afghani bread warm or at room temperature alongside your favorite dips, curries, or as a standalone treat.

Conclusion: With its soft texture, delightful aroma, and distinctive flavor, Afghani bread is a delicious addition to any meal. By following this easy-to-follow recipe, you can recreate the authentic taste of Afghanistan in the comfort of your own home. Enjoy the warm, freshly baked bread and savor the culinary traditions of Afghanistan.

0

Author

authorHello, my name is Jack Sparrow. I'm a 50 year old self-employed Pirate from the Caribbean.
Learn More →


Labels